Monday, July 23, 2012

No Yeast Pizza Bread / Pizza Dough


It'z pizza time!  After a weekend away, we had little to nothing in the fridge for dinner.  Hubby made a yummy tofu tomato egg swirl soup (I haven't learned how to make it yet) but we were still starving so I went online and found a recipe for yeast-less pizza dough! I changed it slightly but it gave me a great basis for the dough.  The consistency is like hybrid between pizza bread and pizza crust but I think it depends on how thinly you roll it and how long you leave it in the oven for.  As there is no yeast in this recipe, don't expect the crust to rise or have all the crusty bubbles that Panago pizza has :).

Lucky for us, my mother-in-law planted fresh mint and basil so I always have them at my disposal :)


I also scoured the fridge for anything I could use as a topping.  Here's what I had available for this recipe:

Ingredients:

Dough
- 2.5 cups all purpose flour
- 2 3/4 tsp baking powder
- 1 tsp salt
- 1 cups of water
- 1 tbsp olive oil
- 1/4 tsp dried oregano
- 1/4 tsp dried thyme
- 1/4 tsp garlic powder

Toppings (Vegetarian because I had no meat at home :( )
- chopped red onions
- fresh cilantro
- fresh basil leaves
- 1 egg
- Canned tomato paste
- Shredded mozzarella cheese
- black pepper

Directions:

1. Start by putting all of the dry ingredients into a mixing bowl.  This would include the flour, baking powder, salt, oregano, thyme, and garlic powder


2. Add in the oil and water in the middle of the dry ingredients


3. Knead the dough with your hands until it forms into a ball.  The dough should not be sticky.  If it is too dry (and not forming), add a little bit of water at a time.


4. Prepare some counter top space to continue kneading the dough.  Make sure your counter top is CLEAN and slightly floured.


5. Continue kneading the dough until it's nice a doughy (that's a word right?) and roll it out with a rolling pin.  I actually divided my dough in half to bake two pizzas because I don't have a very big pan at home.  I also don't have a rolling pin so I used my trusty old Skyy Vodka bottle to do the rolling :) Another great use for vodka!
6. Arrange the toppings however you like


7. Bake at 400 degrees for about 10 mins on the lower rack, then take it out and add an egg in the middle.  Return the pan to the oven for another 10 mins to cook the egg. (I forgot to take pics of the first pizza, before and after egg, so here's some pics of my second pizza :))


8. ...and voilĂ ! Oven fresh pizza straight out of your oven!

Enjoy!

Wednesday, July 18, 2012

Bun Bo Hue (Vietnamese Spicy Noodle Soup)


Hello! Time for some more Vietnamese recipes!  I am particularly proud of this one because 1) Hubby is Viet so it was totally impressive for him; 2) I love spicy food; 3) it takes time and patience, which in my opinion, really shines in this dish.  There is an overnight component to this recipe so don't make it the day you want to eat it...but be sure to plan ahead instead!

Also, feel free to modify the spiciness to your desired level but this is how I make it.  Between hubby and I, the soup stock lasts us for about 3-4  meals.  

Please leave me comments and let me know how it turns out for you! I would love to hear some feedback. <3

Some food notes before I start. This recipe uses a lot of lemongrass stalks and the amount depends on how big the stalks are.  


I buy packages of lemongrass from T&T and use the whole package (less 2 stalks for the sauce) in the soup stock because they are really short.  However, I've purchased lemongrass from a Vietmanese market before and they were huge! I only needed to use about 4 stalks of those ones.

There are many brands of Vietnamese ham out there, here are some samples of ones that I've used for this dish.

Now onto the recipe!!

Ingredients:

Soup stock:
- 2-4 lbs meat bones 
(I usually include a mixture of ox tails, beef bones, ribs, and pork bones.  The more bones in the soup stock, the more flavour it will have.  Everybody's soup pot is of a different size so I would say, fill up about 1/3 of your soup stock pot with meats because you want a lot of flavour in the soup base and the meat on the bones will be eaten with the noodles so there's no waste!)
- 10-12 stalks lemongrass, bruised to release flavour
- 1 large onion, whole
- 1 knob of ginger, about size of thumb
- 2 tbsp fine shrimp paste (mam ruoc hue)
- 4 slices of canned pineapple
- 4 cloves of garlic

Soup sauce:
- 1.5 tbsp annatto seeds
- 4 tbsp grapeseed oil
- 1 large stalk of lemongrass, chopped and minced in food processor
- 3 tbsp garlic chili paste
- 2 tbsp fine shrimp paste
- Food processor or Magic Bullet

Additional meats:
- Cha Chien (Vietnamese ham or fried pork roll)
- 1/2 lbs pig feet, sliced
- 1/2 lbs pork blood, precooked and cubed

Noodles
- Quarter size portion of rice vermicelli, cooked and drained.  This should be enough for 2 people.

Garnish (all, some, or none...it's up to you)
- green onions, chopped
- cilantro, chopped
- bean sprouts, washed, cooked or uncooked
- shredded banana bossom
- lime, quartered
- basil leaves
- mint leaves

Directions:
1. Clean the meat bones by cooking it in boiling water for about 10 mins.  Use just enough water to cover bones with about 1" of clearance.  Doing this will boil the impurities out of the meat and is common in Chinese cooking.


2. Pour out the meat bones and rinse in cold water.  Be sure to clean out the pot too because there will be gunk stuck to the side of the pot.


3. Using the same pot, put the meats back into the pot along with the onion, bruised lemongrass stalk, ginger, garlic, pineapple, and 2 tbsp of the fine shrimp paste.


4. When the soup pot comes to a boil, skim off the top foam which is more impurities being released in the soup stock.  Lower the heat and let it simmer for about 3 hours (I know, it's a really slow process).


5. Let it cool down and put it in the fridge overnight.  I know, it's a pain the butt but you'll want to do this step.  This allows the fat to solidify at the top of the soup stock for easy removal.  Yes, that is actually how much fat is removed from the soup stock....EWWW right?


6.  The next day, reheat your soup stock.  While it is coming to a boil, prepare the spicy lemongrass sauce for the soup in a separate pan. 

7. Chop up a large stalk of lemongrass (or 2 small stalks of lemongrass) and mince it up using the Magic Bullet.  


8. With a non-stick pan, heat up the grapeseed oil in medium heat with the annatto seeds.  Once the pan starts sizzling, lower the heat so that it all of the colour can seep into the pan.  Make sure you don't fry the annatto seeds but get the oil hot enough so that all of the red colour is extracted from the seeds.


7.  Next, discard the annatto seeds but retain the oil.


8. Add the minced up lemongrass, chili paste, and shrimp paste, and let it mix over med/low heat for about a minute to combine the flavours.


 9. Turn off the heat and add the sauce to the soup pot along with the pork blood.  Not everybody likes to eat pork blood but it adds a lot of flavour to the soup base.  You'll see the soup turn red, just like in the restaurants! Allow the soup stock to simmer on low while you prepare the final components of this dish.


10. Time to start making the noodles!  Cook noodles according to noodle package.  This is the one that I use which can be found at T&T supermarket.


11. Start washing, chopping, and/or mincing your garnishes and set aside.  I like to have basil, mint, lime, beansprouts, banana bossom, green onions, and cilantro available for this dish.


12. Now arrange the noodle dishes and make it all pretty for eating! (in case you're wondering, the blue bowl is is my hubby's bowl :))


13. Scoop in the soup stock, making sure you get in some of the meat bones.  The meat should be falling off the bones and full of yummy goodness!  


When you are done with the soup base, let it cool and refrigerate the leftovers so that you have the soup stock available for the next meal.  

Easy breezy right?? Enjoy!

Thursday, July 12, 2012

Hong Kong Style Baked Pork Chop on Fried Rice


For those of you who may have noticed - I changed my blog name from Jenn's Chopsticks to JJ's Chopsticks to include my hubby <3.  He was actually the first to make this dish in our household so the least  I could do was to give him some credit :)  There will be times when I will just photograph yummy meals that he cooks so it just made sense for me to change the blog name.  Thanks for everybody that has viewed my blog thus far!

Today's item is Hong Kong Style Baked Pork Chop on Fried Rice.  There are really three main components to this dish: Fried rice, fried pork chop, and tomato sauce.

Note that fried rice is normally made with leftover rice...but I didn't have any leftovers so this recipe uses fresh rice instead.  Feel free to use whichever one is handy for you.

Ingredients (broken down to making the components)

Pork chop marinade:
- 4 pieces of pork chop, pounded flat
- 2 tsp Chinese wine
- 2 cloves of garlic, chopped
- 2 tsp salt
- 1 tsp sugar
- 2 tsp grounded black pepper

Additional items after the marinade for the pork chop fry batter:
- 2 eggs or 1 egg and 1/2 cup of egg whites
- 1 cup of flour
- 1.5 cups of bread crumbs
- grapeseed oil for frying

Fried Rice:
- 1.5 cups of cooked rice (I usually cook 1 cup brown rice to 1/2 cup white rice)
- 1 egg
- 1/2 tsp salt
- 2 tbsp oil

Tomato Sauce:
- 3 Tomatoes
- 2 small onions or 1 large onions
- 2 cloves of garlic, chopped
- 1 tsp salt
- 1 tsp black pepper
- 1 tbsp cornstarch diluted with 1/2 cup of water
- 5 tbsp ketchup
- 1 tbsp Worcestershire sauce
- 1 tsp sugar
- 1 handful of mozzarella cheese to cover the top layer of the dish

Directions:

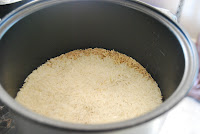
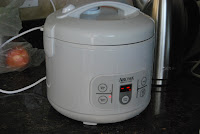
1. Cook rice in rice cooker.  Brown rice normally takes about 40mins to cook but following the directions on your rice cooker would be your safest bet.  Be sure to wash the rice until the water runs clear prior to cooking.  Set it and forget it!


2. Prepare the meet for marinade.  Take your pork chop and pound it down with a mallet or in my case, the bottom of a mug works well too.


3. Mix together all the ingredients listed for the marinade with the pounded pork chops and let it sit for 30 mins in your fridge to marinade.

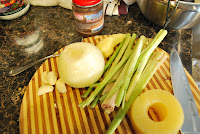
4. Prepare the tomato sauce.  Here is a sample of some of the ingredients needed.  Start by dicing the tomatoes, onions, and garlic.


 5. Heat up your pan to medium heat and add some grapeseed oil. Once the oil is hot enough, add the chopped garlic and diced onions.  Cook until the onions are kind of see through but not burnt.


6. Add your diced tomatoes to the pan and cook until the tomatoes are soft.


7.  Mix the cornstarch with water in a bowl to fully dilute the cornstarch.  This will help thicken the sauce.


8. Add remaining spices and cornstarch mixture to the pan and let it simmer on low for a few minutes until to the desired consistency.  For an extra kick, we like to add 1.5 tsp of garlic chili sauce to this but that is completely optional.


9.  Take the pork chops out of the fridge and prepare it for frying.  In three separate plates, designate one plate for the flour, another for the beaten egg, and the last one for the breadcrumbs. (I know, I have limited counter top space... )


10. Heat up a nonstick pan with abt 1/4 inch of grapeseed oil for frying

11. Take a marinated pork chop, cover it in flour, dredge it through the beaten egg mixture, cover it in breadcrumbs...and then repeat the egg dip and breadcrumb dip for extra crispiness.


12. Place the breaded pork chop in the heated pan for frying.  Be sure to turn the heat down to medium to prevent uncooked meat with scorch marks :) 


13. Cook both sides of the pork chop until golden brown (or desired colour).  Be sure to check if the meat is cooked by cutting down the centre of one of your pork chops and seeing that it is no longer pink in the middle.  Set aside in a strainer to remove any dripping oil.


14. Prepare the fried rice.  By now, the rice you made earlier will be done so you can either drain the pork chop pan of most of its leftover oil for the fried rice or use a new pan. I like to minimize my dishes so I drained the remaining grapeseed oil into a bowl and kept just a little bit for the fried rice.

15.  Add the beaten egg and scramble it in the pan.


16. Add your cooked rice to the pan, a little bit of salt and stir fry for about 3 mins.


17.  Transfer the fried rice to a baking pan


18. Layer the deep fried pork chop on top of the rice (looking good so far!)


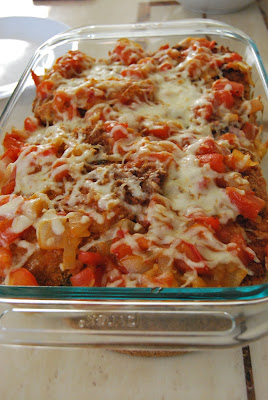
19. Pour your tomato sauce over the pork chop and add some shredded mozzarella cheese


20. Bake at 350 degrees for 10 mins or until the cheese layer is melted and gorgeous!


 Enjoy! =)